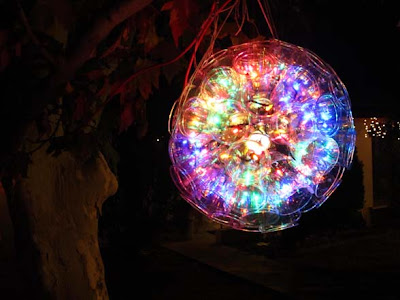
Somehow, clear, colorful round things just make me happy at the holidays. (any day, really) They seem to radiate peace and calm, as well as beauty.
Do you remember when these sparkleballs were popular some 10 years ago? I always wanted to *buy* one for our holiday lighting. I was informed that you had to make them yourself. With then 2 and 6-year-old kids, the prospect of making one was too daunting.
But now it is 10 years later, and we have You Tube to show us how! The now 12 and 16-year-old are also more than able to do this project. Check out the DIYs below, if you might want to know how to make sparkleballs yourself:
This video uses a soldering iron to melt holes in the cups (for the lights) and to melt the cups together.
And then there is this video, showing a different construction method:
This method uses a drill to make the holes, and a stapler to attach the cups together.
We originally wanted to go for the drill and staple method, but we bought a bag of hard plastic Chinet cups . Due to their composition, these cups simply crack and /or shatter when drilled.
So we adapted the first method to our project; we used a glue gun (sans glue sticks) to melt a hole in the bottom of each cup, and then the glue gun again (with glue sticks) to glue the cups together. We did the melting part outside, where there was plenty of ventilation.
Here is our first result:
It's our oblong sparkleball! (-: It uses 1 strand of 50 lights.
Yearning for more round colorfulness, we made another one the next day. This time we used clear cups made of a softer plastic. We could have used the drill and staple method, but the stapler was jammed, and we had the glue gun method down pretty well- so we used it again.
Some things we learned:
*Even when purchasing the correct size, sometimes the numbers of cups per row will vary a little. There will be gaps. It's okay- the finished product looks great, gaps and all.
*The more places you can fasten the cups together, the more stable the structure!
*It is hard to find strings of holiday lights in the stores 6 days before Christmas, but stay flexible with availability, and see the possibilities!
*You can always make the holes bigger, but can't make them smaller!
*This activity can promote great fun and bantering between teenage siblings!
Our second ball came out more round-looking, and much bigger than we expected. It uses 100 lights. (well, it uses 74 lights- the rest were crammed in the middle of the ball) I think it is so lovely, that I posted it's picture twice in this post!
Now we are on a roll. We imagine what it would be like to use clear, multicolor cups with white lights, an all-red sparkleball, an all-blue sparkleball, a half green and half red sparkleball, a sparkleball made of entirely yellow lights , or yellow and orange, to resemble the solstice sun. My favorite idea is to get a strand of lights that change colors, while slowly fading from one color to the other. Wouldn't that be ethereal?
What will tomorrow bring?????
(-:


Super cool! I've actually never heard of these until I read your post, but it looks like something my boys would love to make - especially since you added tips of what you're learned. :) Nothing like a little Christmasy bling!
ReplyDeleteHi Mama Tea! good to see you!
ReplyDeleteThis project might be good to do in several smaller chunks of time, unless the kids are really gung-ho. The lady in the second video makes it look so quick and easy! I think she's made a few sparkleballs already. (-:
Happy Holidays!